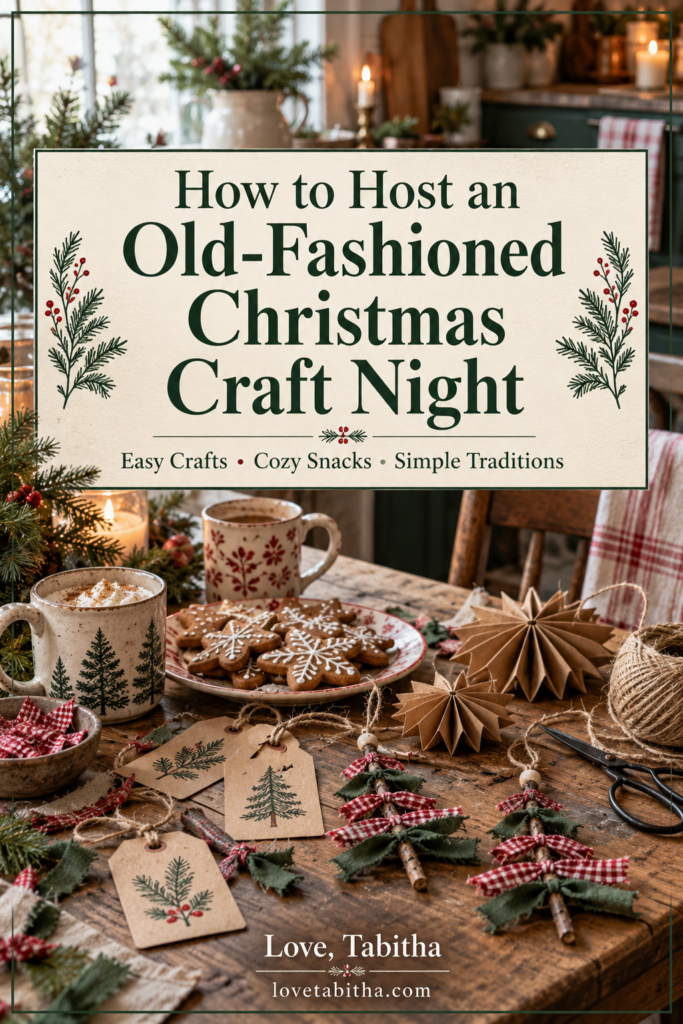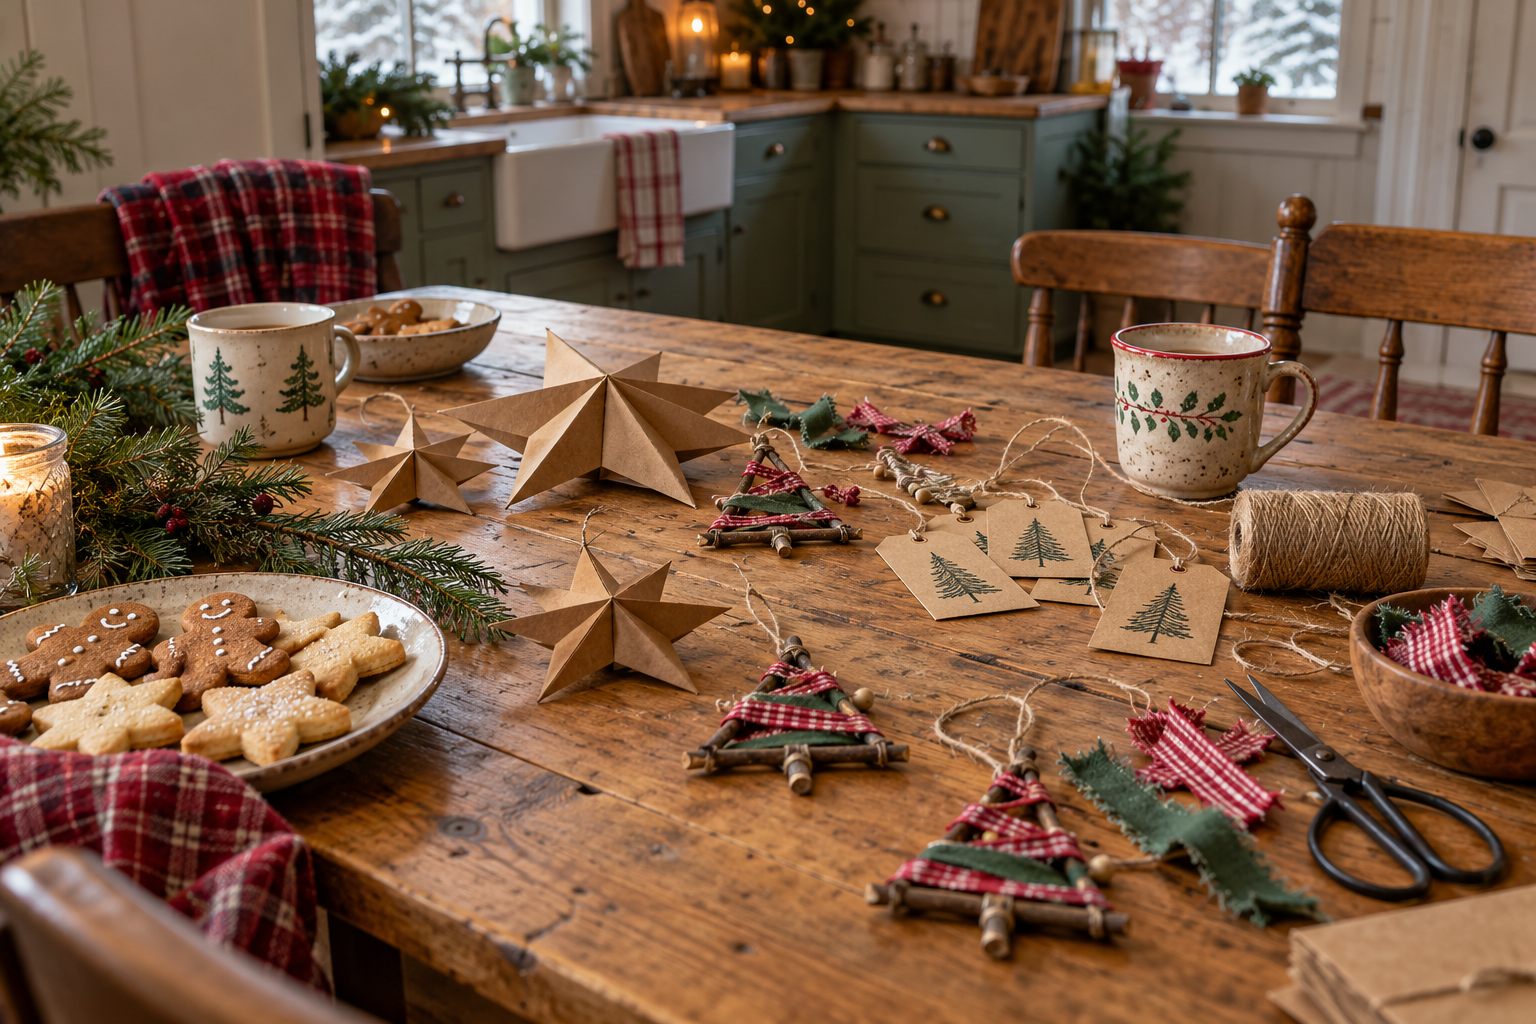
How to Host an Old-Fashioned Christmas Craft Night: Easy Crafts, Cozy Food & Simple Traditions
Put the kettle on, pull out the ribbon scraps, and make room at the kitchen table. We’re having an old-fashioned Christmas craft night—and nobody needs to be particularly crafty to come.
There’s something so inviting about an evening spent making things together. A little Christmas music, something sweet to nibble on, and a table covered in paper stars and bits of greenery can turn an ordinary December night into a memory worth keeping.
For me, this is exactly the kind of holiday gathering that sounds lovely: cozy, a little messy, and centered around spending time together. The ornaments don’t need to match, the house doesn’t need to be spotless, and store-bought cookies are absolutely welcome.
Here’s how to host an old-fashioned Christmas craft night with easy projects, simple refreshments, and plenty of room for conversation.
This post contains affiliate links. If you make a purchase through these links, I may earn a small commission at no extra cost to you.
Your Christmas Craft Night at a Glance
- Guests: Four to eight people is a manageable starting point, depending on your table space.
- Time: About two hours.
- Crafts: Choose one main project and one easy extra.
- Food: One warm drink, one sweet treat, and one savory snack.
- Decor: A tablecloth, a few evergreen clippings, and warm lights.
- Guest takeaway: A handful of handmade ornaments or gift tags.
My favorite simple combination: Paper stars, handmade gift tags, hot cider, and a plate of gingerbread cookies. Most of the supplies can come from things you already have.
1. Keep the Guest List Small and the Invitation Welcoming
Invite a few friends, neighbors, or family members who would enjoy a relaxed evening around the table. This could also be a sweet mother-daughter gathering or a multigenerational afternoon with grandparents and kids.
Make it clear that nobody needs to bring craft skills—or a trunk full of supplies.
You could write:
“Come over for a cozy Christmas craft night! We’ll make a few simple decorations, sip something warm, and enjoy a little holiday time together. I’ll have the supplies ready—just bring yourself. Handmade and imperfect is the plan!”
If you’d like guests to contribute, ask them to bring a favorite cookie or some ribbon scraps. Keep it optional so coming over still feels easy.
2. Set a Cozy Table You Can Actually Work At
The craft table is the heart of the evening, so give people space to spread out. Start with a washable tablecloth or kraft paper to protect the surface, then put shared supplies in small jars, baskets, or muffin tins.
A few evergreen clippings down the center and a strand of warm lights are plenty. Save the big centerpiece for another night; you’ll want that space for scissors and somebody’s increasingly ambitious paper star.
For an old-fashioned feel, use what you have:
- Mismatched mugs for warm drinks.
- Jam jars for pencils and brushes.
- A basket for fabric scraps.
- A thrifted tray for finished ornaments.
- Cloth napkins or a favorite well-loved tablecloth.
Helpful supply: A set of battery-operated taper candles adds a soft glow without an open flame beside paper and ribbon. Keep enough room lighting for everyone to see their work comfortably.
3. Choose Easy Christmas Crafts That Leave Room for Talking
The best projects for a gathering have a few simple steps and can be picked up again after a cookie break. Choose one main craft, then offer gift tags as an easy extra.
Set out a finished example so guests can see what they’re making. It helps people get started without turning the evening into a class.
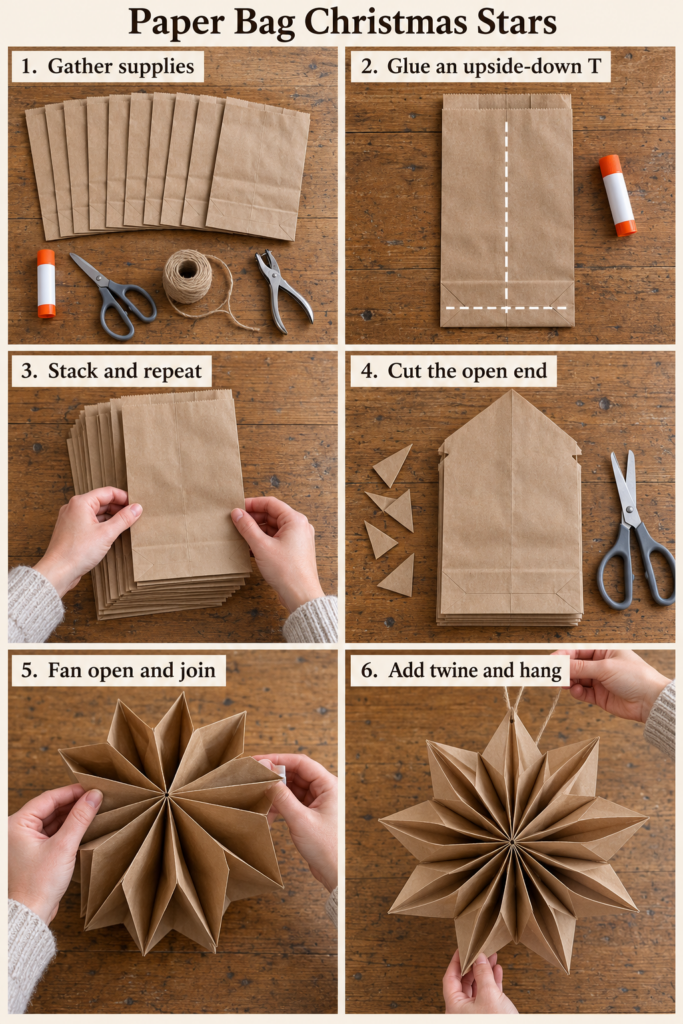
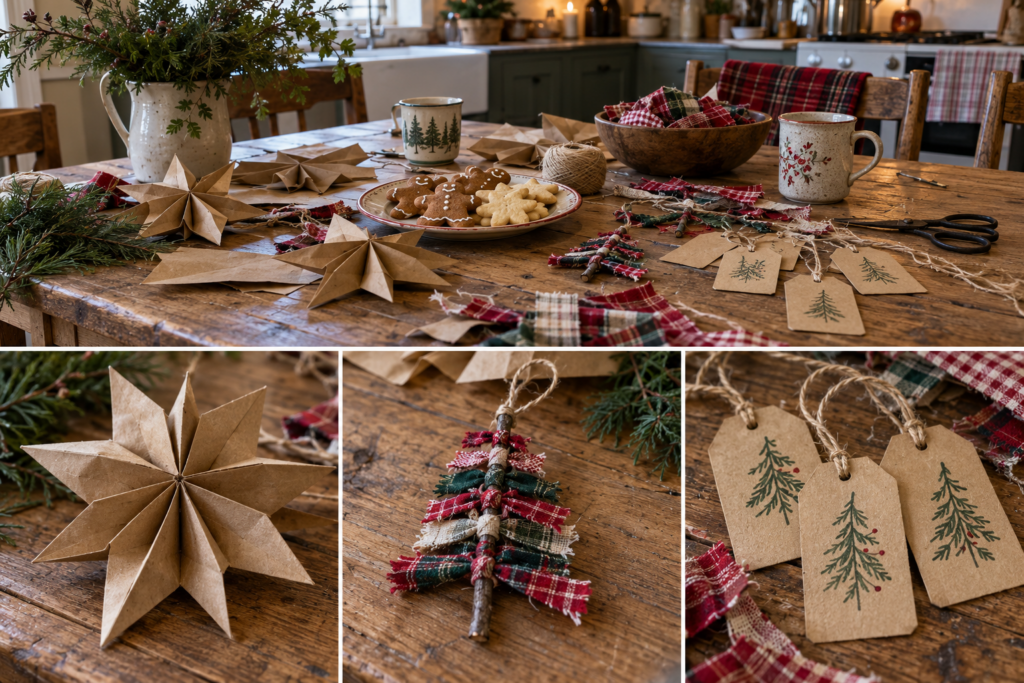
Paper Bag Christmas Stars
These are wonderfully festive hanging in a window, above a mantel, or over the craft table. Plain brown bags give them a rustic look, while white bags look lovely against greenery.
You’ll need:
- Seven to nine matching paper lunch bags per star.
- Glue sticks.
- Scissors.
- String or ribbon.
- A hole punch.
How to make them:
- Lay a bag flat with its opening at the top. Apply glue in an upside-down T: one line down the center and one across the closed bottom edge.
- Press another bag on top in the same orientation. Repeat until all the bags are stacked and glued.
- Let the glue set, then cut the open end of the stack into a point. Small notches along the sides are optional; leave the bottom and center intact.
- Gently fan the stack open until the first and last bags meet. Glue those faces together to form a star.
- Punch a hole through a sturdy section, add string, and hang.
Make a sample before your gathering to check your bags and glue. Adults can help children cut through the thick stack of paper.
Helpful supply: A pack of plain paper lunch bags is an easy purchase to share across the table. Check the pantry first—you may already have enough.
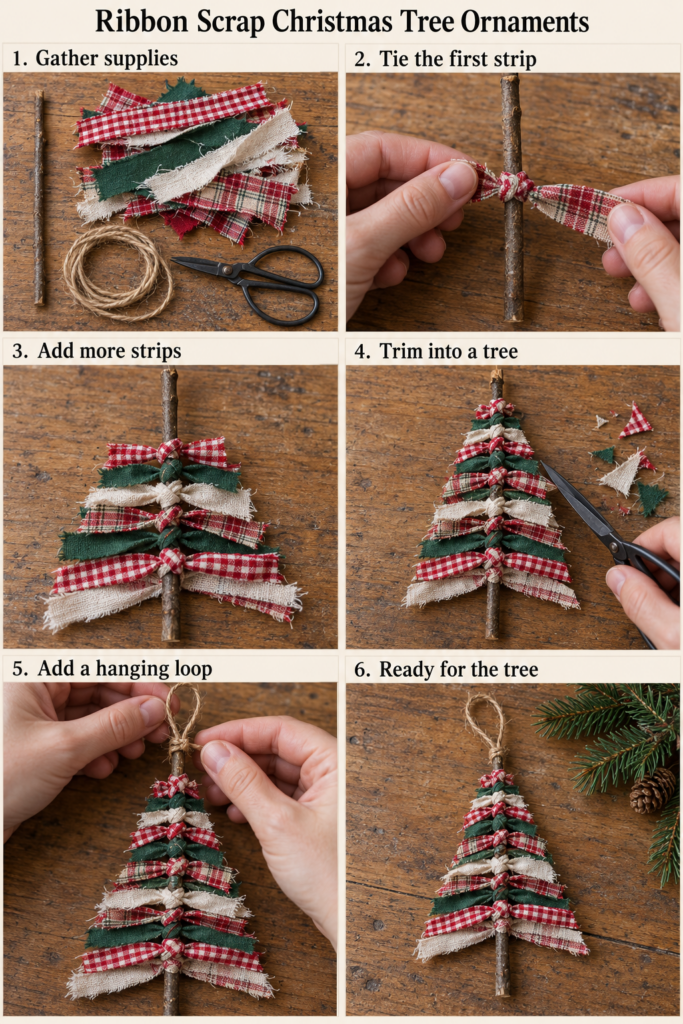
Ribbon Scrap Christmas Tree Ornaments
This is such a sweet way to use little pieces of fabric and ribbon that are too pretty to throw away. Plaid, gingham, ticking stripes, and faded florals all suit the old-fashioned look.
You’ll need:
- Small, clean, dry twigs.
- Fabric strips or ribbon scraps.
- Twine for hanging.
- Scissors.
- Craft glue, if needed.
How to make them:
- Choose a twig about five or six inches long for the trunk.
- Tie strips around the twig, keeping the knots close together and leaving a little bare trunk at the bottom.
- Trim the ends into a Christmas tree shape, narrow at the top and wider at the bottom.
- Tie a hanging loop at the top, using a little craft glue to secure it if necessary.
There’s no need to make every tree the same. Half the fun is seeing how differently they turn out from the same basket of scraps.
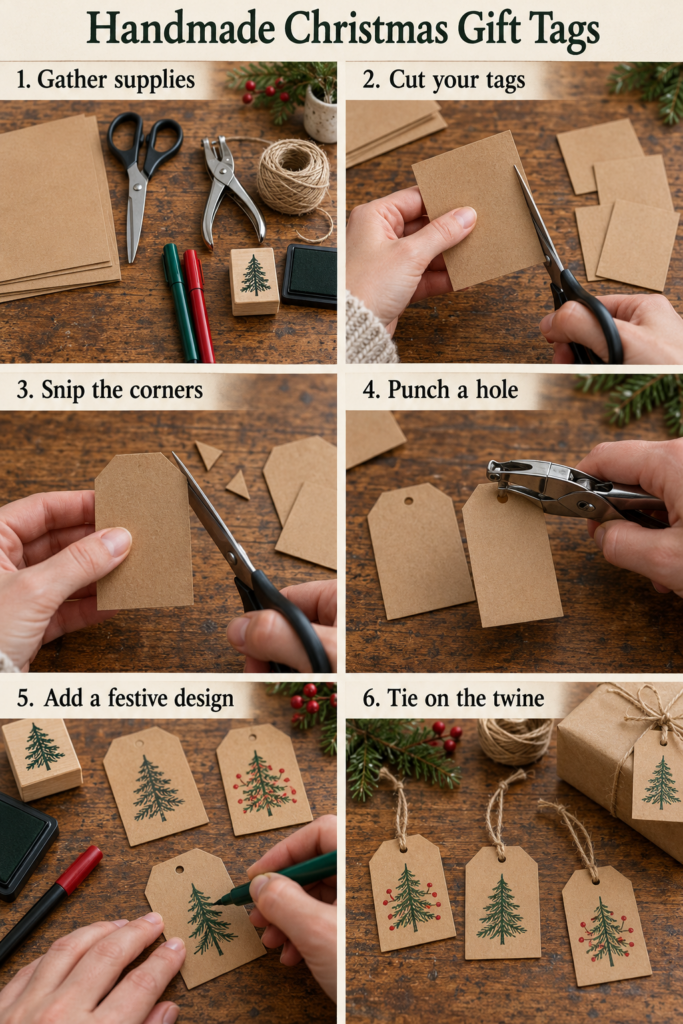
Handmade Gift Tags
Gift tags are a good choice for anyone who wants something quick and useful. They’re also an easy second project for guests who finish early.
You’ll need:
- Cardstock or clean sections of thin cardboard packaging.
- Scissors and a hole punch.
- Stamps, ink, colored pencils, or markers.
- Twine and small ribbon scraps.
Cut simple rectangles, snip the top corners if you like, and punch a hole for the string. Add a stamped evergreen, a little hand-drawn tree, or a handwritten “Merry Christmas.” Leave room for the recipient’s name.
Children can draw pictures while adults stamp or letter their tags. A wobbly little Christmas tree drawn by a child may end up being the most treasured thing on the present.
Helpful supply: A small Christmas rubber stamp set with an ink pad makes decorating easy for guests who don’t enjoy drawing.
4. Gather Supplies Before You Buy Anything
Before placing an order, look through your craft drawer, recycling, and gift-wrapping supplies. Old Christmas cards can become tags, leftover ribbon can become ornaments, and clean jars can hold everything on the table.
For a lower-cost gathering, choose one project and buy only what’s missing. There’s no need for everyone to make three different things.
If you’re buying one reusable item, a comfortable pair of craft scissors will get used long after Christmas. A couple of shared pairs may be enough, though having more will reduce waiting.
Set out a small tray for each guest with the basic pieces for the main craft. Keep the shared extras in the middle so everyone can reach them.
5. Serve Cozy Food That Keeps Hosting Simple
You don’t need to cook dinner to make people feel welcome. If you’re serving snacks, schedule the gathering after dinner and mention that in the invitation.
Choose food that’s easy to pick up between projects:
- Gingerbread cookies or molasses cookies.
- Shortbread.
- Cheese, crackers, and sliced apples.
- A bowl of clementines.
- Popcorn served in individual cups.
For drinks, offer hot chocolate, coffee, tea, or warm apple cider. A pot of cider with orange slices and cinnamon sticks makes the kitchen feel festive before anyone even arrives.
Keep refreshments on a separate counter if you can. It frees up working space and gives everyone a reason to stand up, stretch, and admire what other people are making.
The easiest menu: Warm cider, a plate of cookies, and cheese and crackers. That’s plenty.
6. Give the Evening a Gentle Rhythm
A loose plan helps you enjoy your own gathering. For a two-hour craft night, try this:
| Time | What to do |
|---|---|
| First 20 minutes | Welcome guests, pour drinks, and catch up. |
| Next 10 minutes | Show the sample and explain the main project. |
| Next 50 minutes | Craft, chat, and help each other. |
| Next 25 minutes | Refill drinks, enjoy snacks, and make a few gift tags. |
| Last 15 minutes | Admire the finished pieces and pack them for home. |
Leave the schedule flexible. If everyone spends an extra half hour talking and makes one ornament, it still sounds like a lovely evening to me.
7. Make It Easy for Kids to Join In
For a family Christmas craft night, prepare a few pieces ahead of time. Precut fabric strips, ready-to-decorate tags, washable markers, and child-safe scissors will help younger guests get started.
An adult can handle cutting the paper bag stacks while children choose the shapes or help glue individual bags. Older kids may enjoy making ornaments for friends or decorating tags for family gifts.
Keep small supplies away from little ones, and give children their own reachable materials so they can participate without waiting for every step.
Let their projects look like their projects. The funny-shaped ornaments are often the ones you want to hang up again next year.
8. Send Everyone Home with Something Handmade
Set out paper bags or small boxes for finished crafts. Let any wet glue dry before packing, and put delicate paper stars on top so they don’t get crushed.
Encourage everyone to write the year discreetly on one ornament. It takes a moment, but it makes rediscovering it in the Christmas box that much sweeter.
If guests enjoyed themselves, this could become an annual tradition. Take turns hosting, choose a different project each year, or keep making the same simple ornaments and enjoy how your collection grows.
Christmas Craft Night Questions
What is the easiest Christmas craft for a group?
Handmade gift tags are one of the simplest options. They take up little space, need minimal instruction, and let guests make as many or as few as they like. Ribbon scrap trees are another approachable choice.
How do you host a Christmas craft night on a budget?
Keep the group small, choose one main craft, and gather supplies from home before shopping. Share tools, use ribbon and paper scraps, and serve a warm drink with a simple snack.
What should guests bring to a Christmas craft night?
You can provide everything and ask guests simply to come. If you’d like contributions, suggest optional cookies, ribbon scraps, or an extra pair of scissors. Tell guests exactly what you’ll supply so they don’t feel they need to shop.
How long should a Christmas craft night last?
About two hours gives guests time to settle in, complete a simple project, and enjoy refreshments. Choose projects that can be finished during the gathering without long drying times.
A Little Paper, a Little Ribbon, and Time Together
Some of the loveliest Christmas traditions start with an ordinary invitation: come over, have a cup of something warm, and make something with me.
Pull out the good cookie recipe—or open the package from the store. Clear a space at the table. Put on the Christmas songs everyone knows. You might end the night with paper scraps on the floor and glue on the tablecloth, but you’ll also have a few handmade treasures and an evening you’re glad you made time for.
What would you make at an old-fashioned Christmas craft night—paper stars, ribbon trees, or handmade gift tags? Tell me in the comments!